I have been pretty lazy ever since I moved into my new house last November and took a three week vacation. I haven’t had many projects lately, but after going to SOAK last May, I was finally inspired to do something. SOAK is the regional Burning Man event for the Pacific Northwest. I had never been before, but I had a blast while I was there. I noticed that some people had some nifty leather pouches they were using to carry stuff around. I thought that would be useful for me, but I don’t really like the fanny pack look. Instead, I figured I could make something similar to that but in the style of a shoulder holster. I had thought about doing this back when I built my Uncharted 2 holster, but I didn’t think I’d really have any reason to wear something like that. SOAK made me realize that it would be good festival wear.
The main function of this piece is to hold all of my every day carry items. That means my cell phone, Leatherman, wallet, and keys. Normally these things are all crammed in my pockets. I wanted to design a nice looking leather shoulder holster that could hold all of these items while still being comfortable to wear and still have these things easily accessible. I also thought it would be handy to have room for other miscellaneous small items.
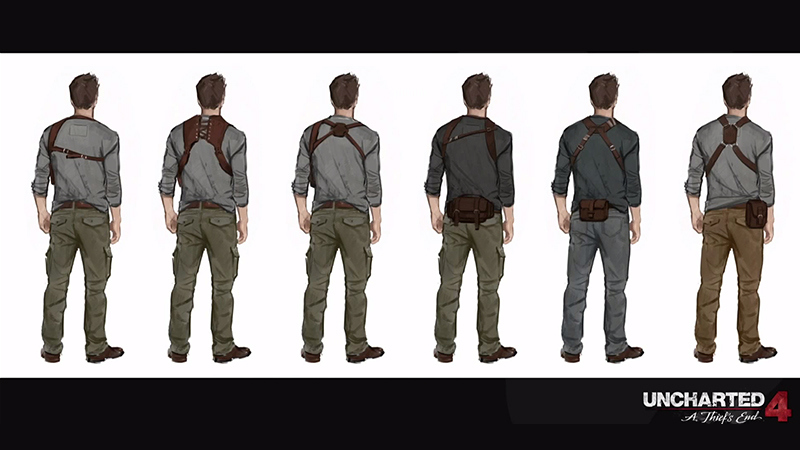
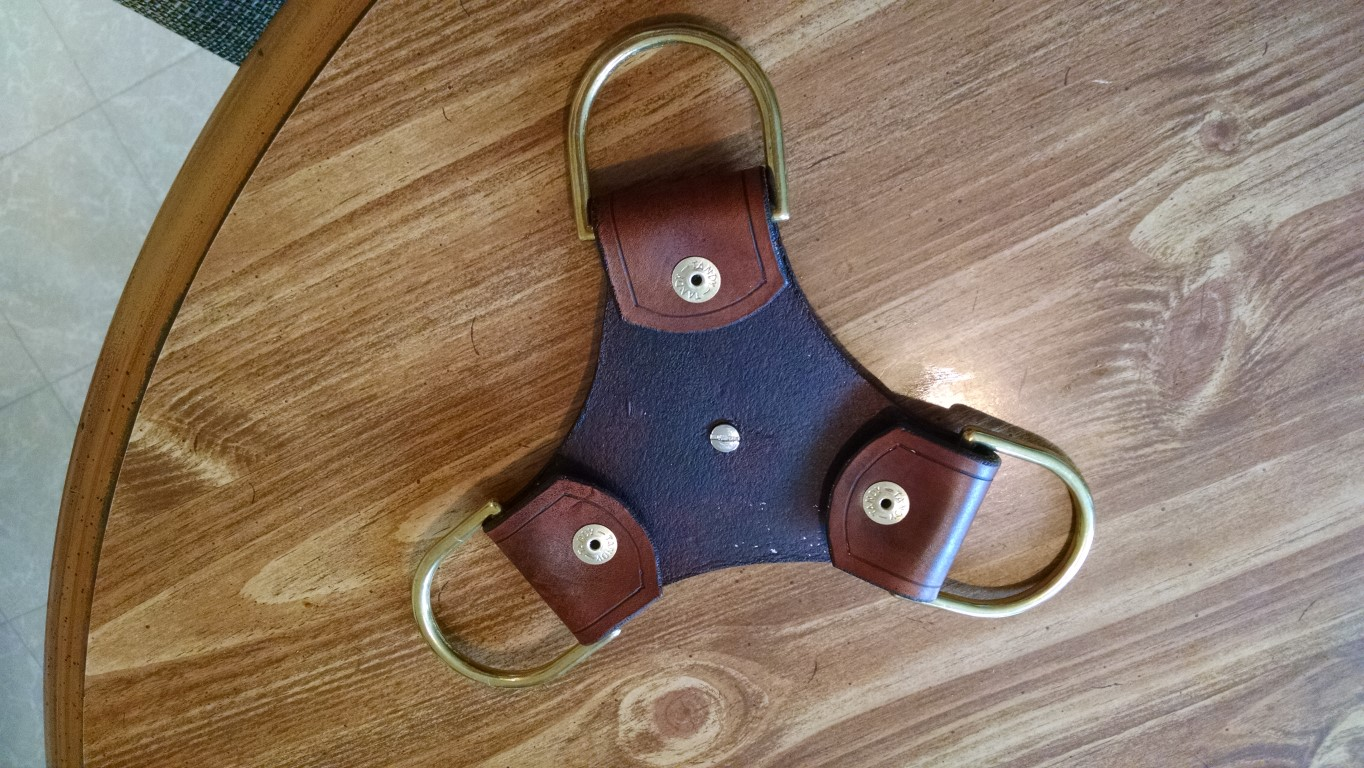
I started out by making some designs on paper. I took inspiration from Uncharted of course. I actually found some early concept art holster design’s from the upcoming Uncharted 4 game and started with those. I actually ended up not really going with any of those designs, but it was good inspiration anyway. Eventually I settled on something that was a blend between the holster from Uncharted 3, and my own design. I mainly took the adjustment straps, conchos, and overall look and feel from Uncharted 3. The actual design of the back plate, pouch, and holster are my own design. They are probably influenced from the many holsters I looked at via Google images while I was in the planning stages.
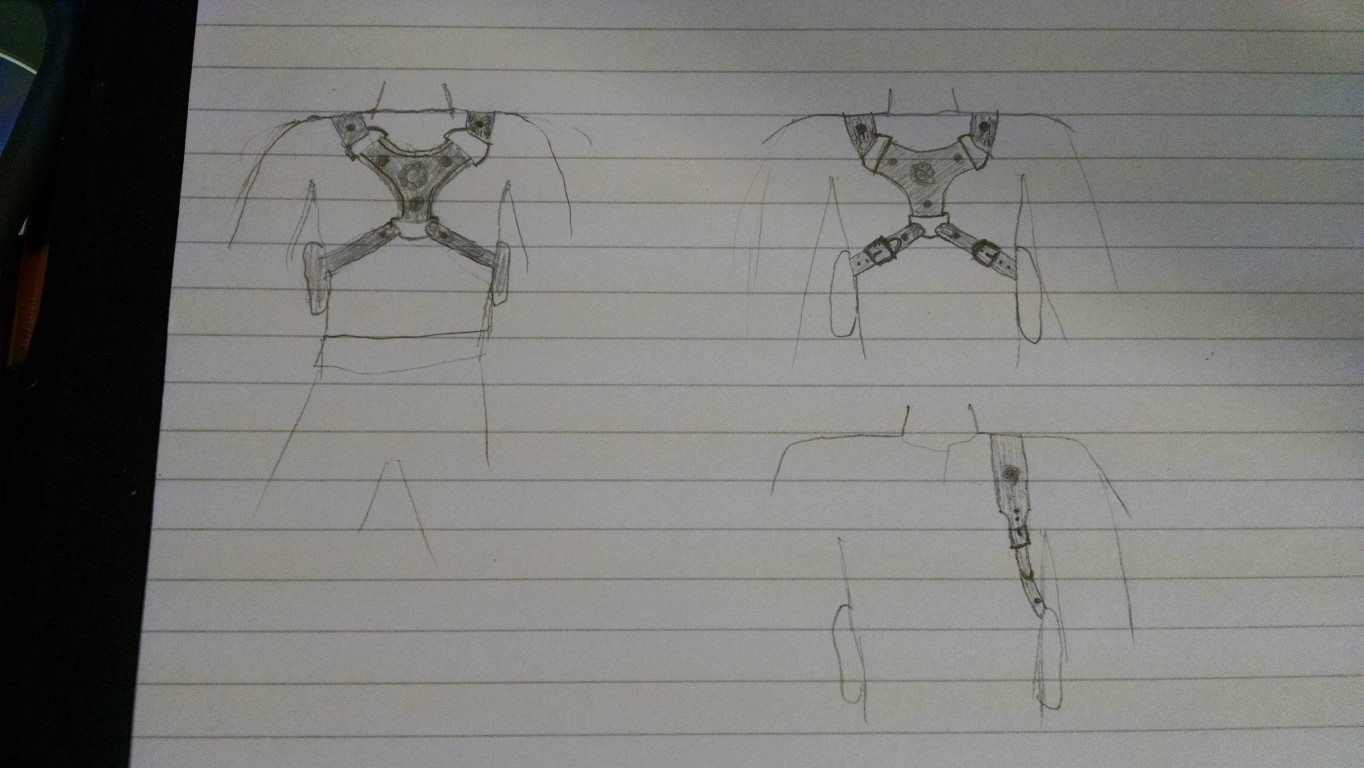
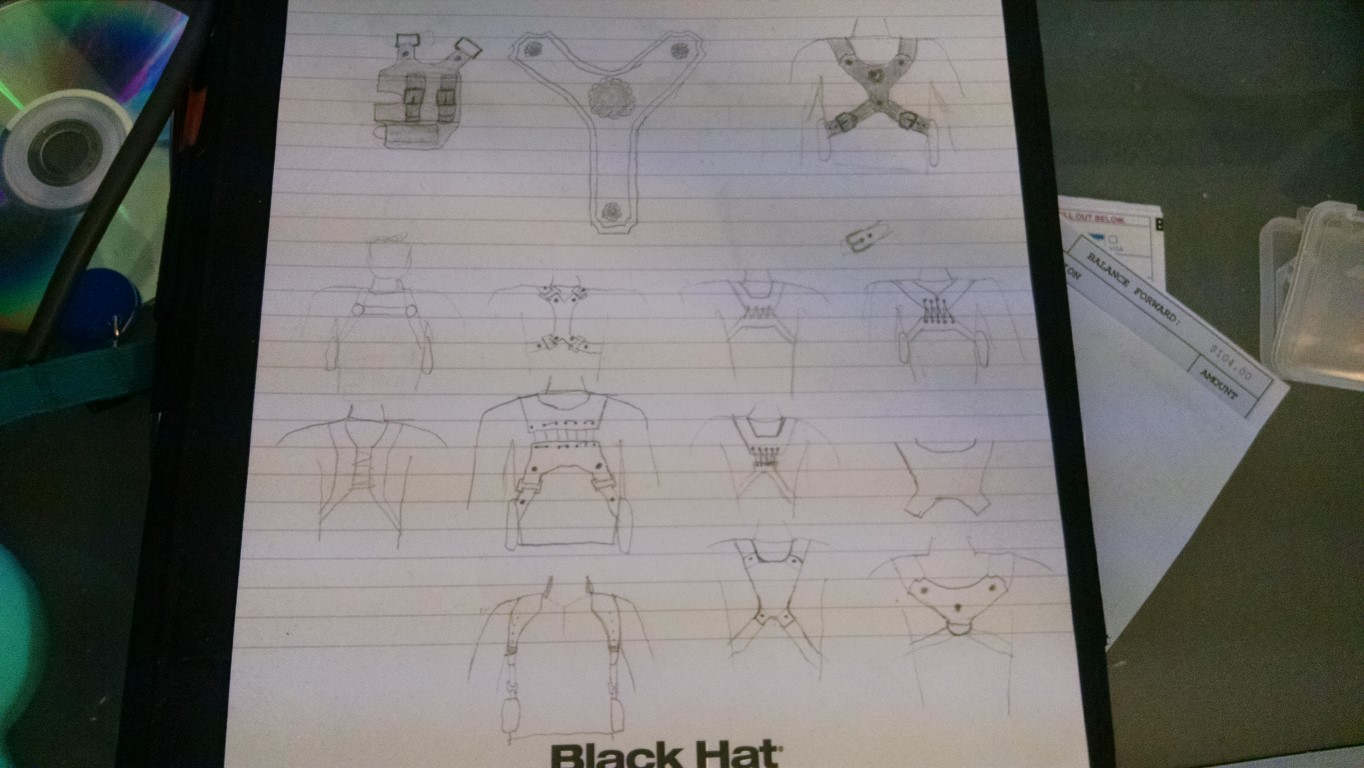
Once I had something on paper, I moved into Sketchup. I chose this program because I already knew how to use it. I designed the back plate, holster plate, phone pouch, and big leather pouch all in Sketchup. I looked up measurements for my phone online and then scaled the pouch up a little bit to be on the safe side. I also figured if the pouch is a little bit too big, this would make it more likely for me to be able to fit an upgraded phone down the road. Speaking up upgrading phones, I also wanted the phone pouch to be replaceable. That way, if my phone did end up being too big, I could build another pouch later without having to make the entire holster plate over again. I ended up going with straps and buckles to hold the pouch in place. This was not only functional, but also added nicely to the aesthetics of the piece.
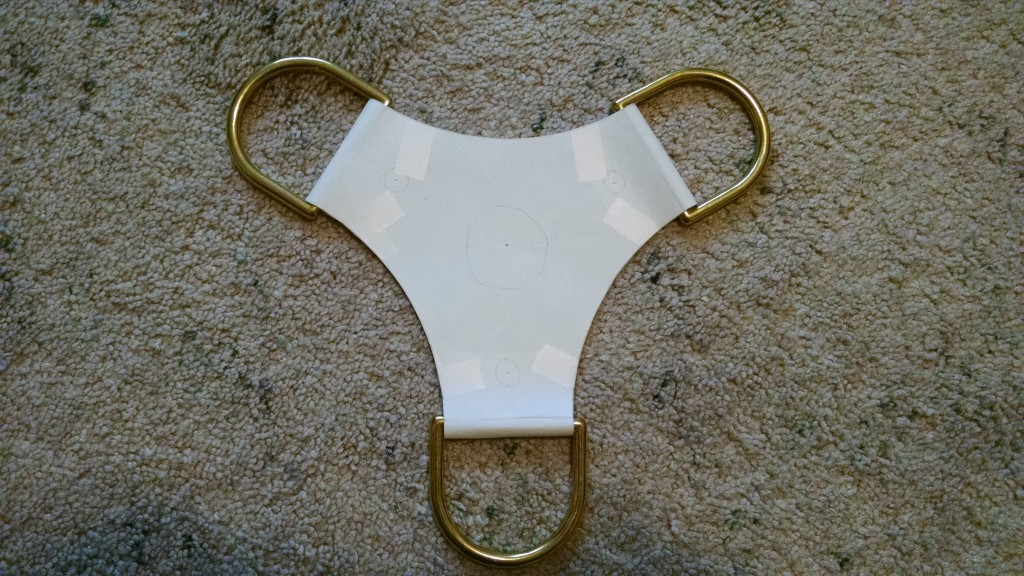
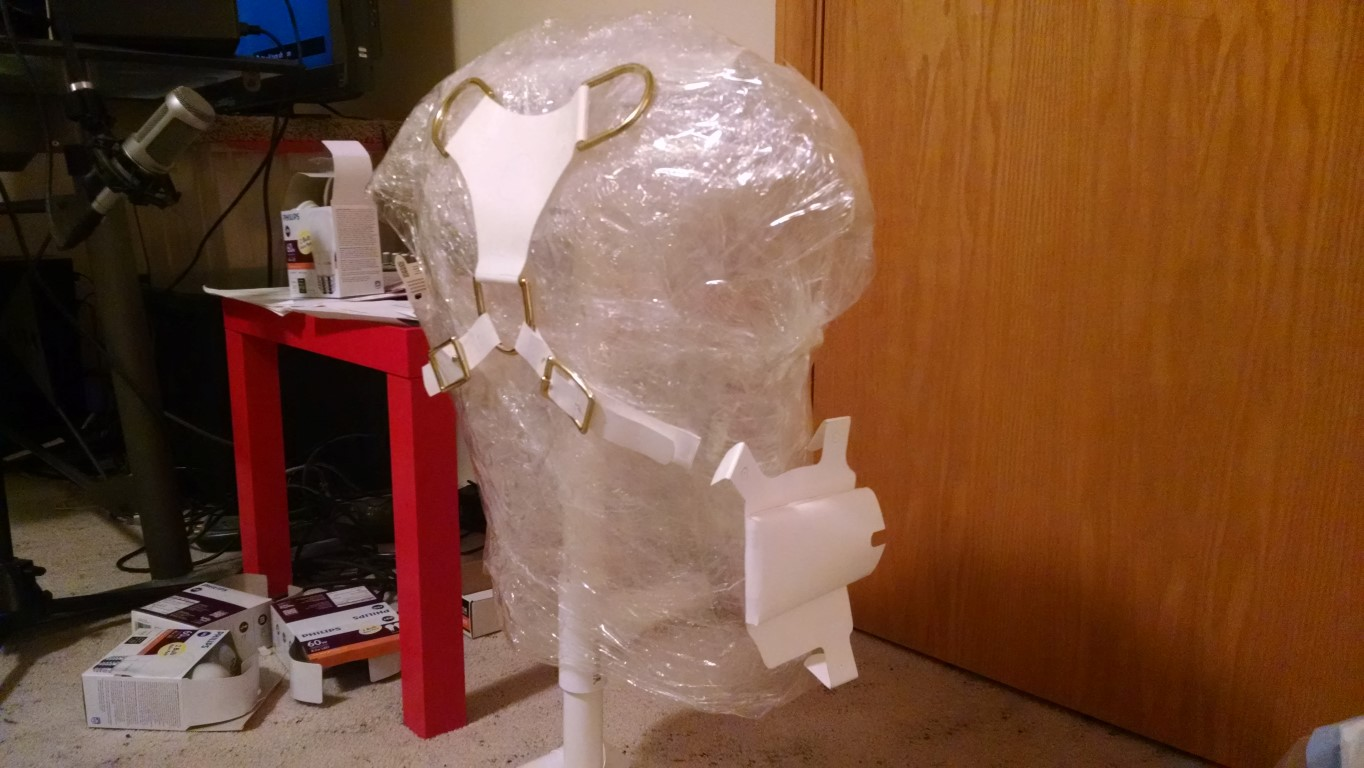
Once I had the pieces designed in Sketchup, I printed them out onto paper and cut them out. Then I traced them onto thicker poster board and cut those out. I taped them onto my mannequin that I made for the Uncharted 2 holster project to figure out where I wanted them to sit. I made any adjustments as necessary. Then I used a tape measure to figure out the ideal length of the straps and cut some out of poster board. I bought some of the basic hardware including the D-rings and the buckles from Tandy, and built most of the holster out of poster board.
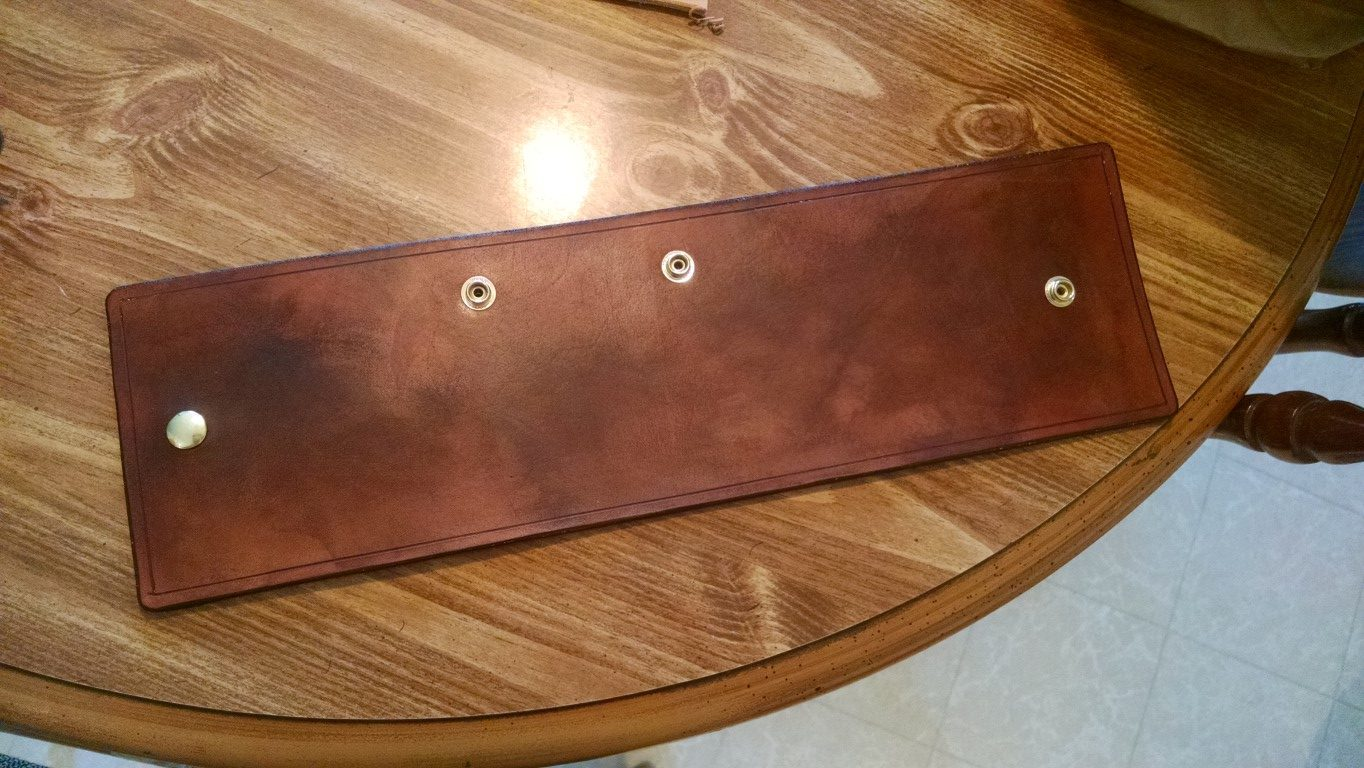
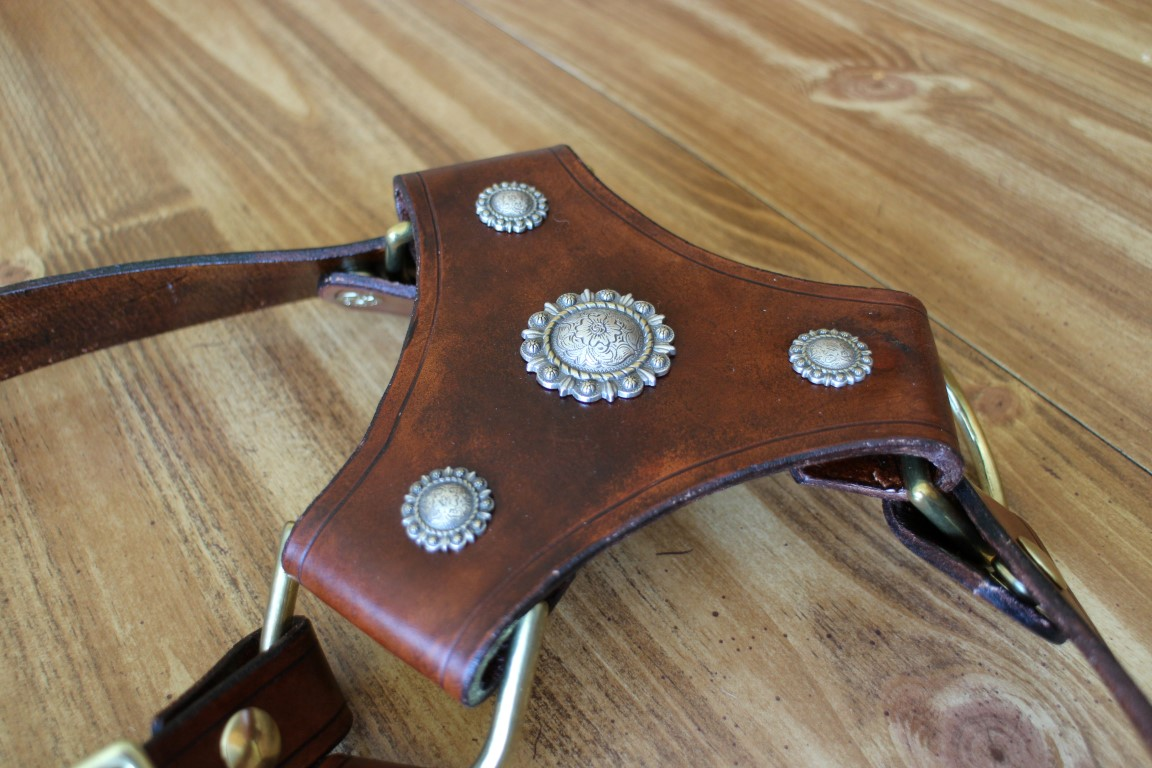
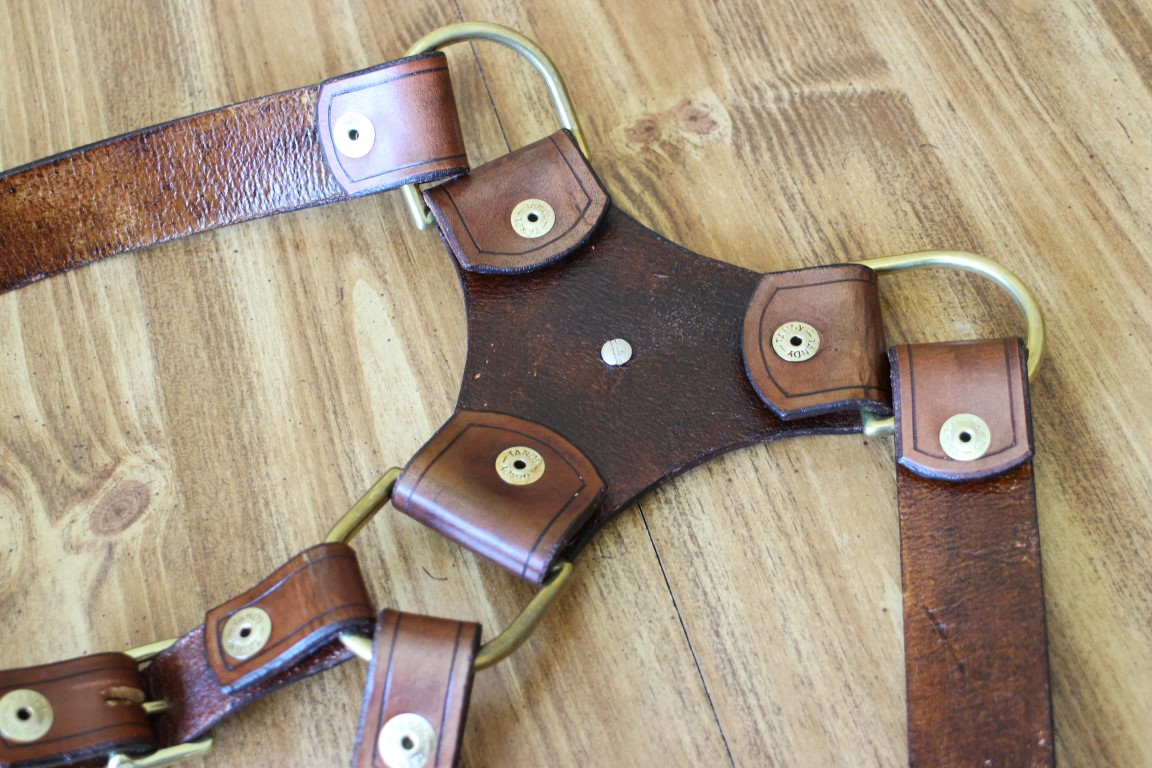
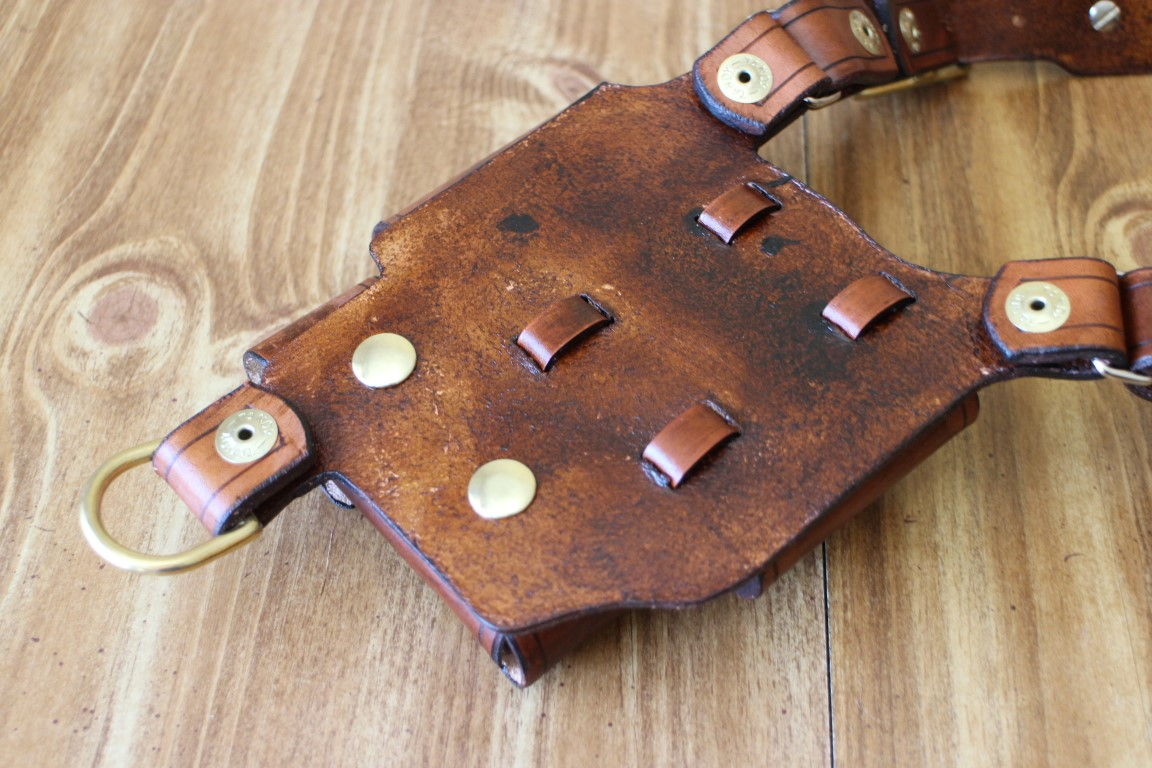
Once I had all of the parts figured out, it was time to start working with leather. I started with the back plate. I cut it out, made the outline with the stitching groover, and then beveled the edges. I used Eco-Flow Fudge Brown dye. This was a 2-in-1 dye with finish. I must say I was not impressed with this stuff. I bought it because I really liked the color, but in the future I will not purchase any more 2-in-2 products. This stuff was much more viscous and difficult to apply, especially to tight areas like inside the grooves. It was messier, and it also bleeds a LOT I found out about halfway through. At least it looks nice.
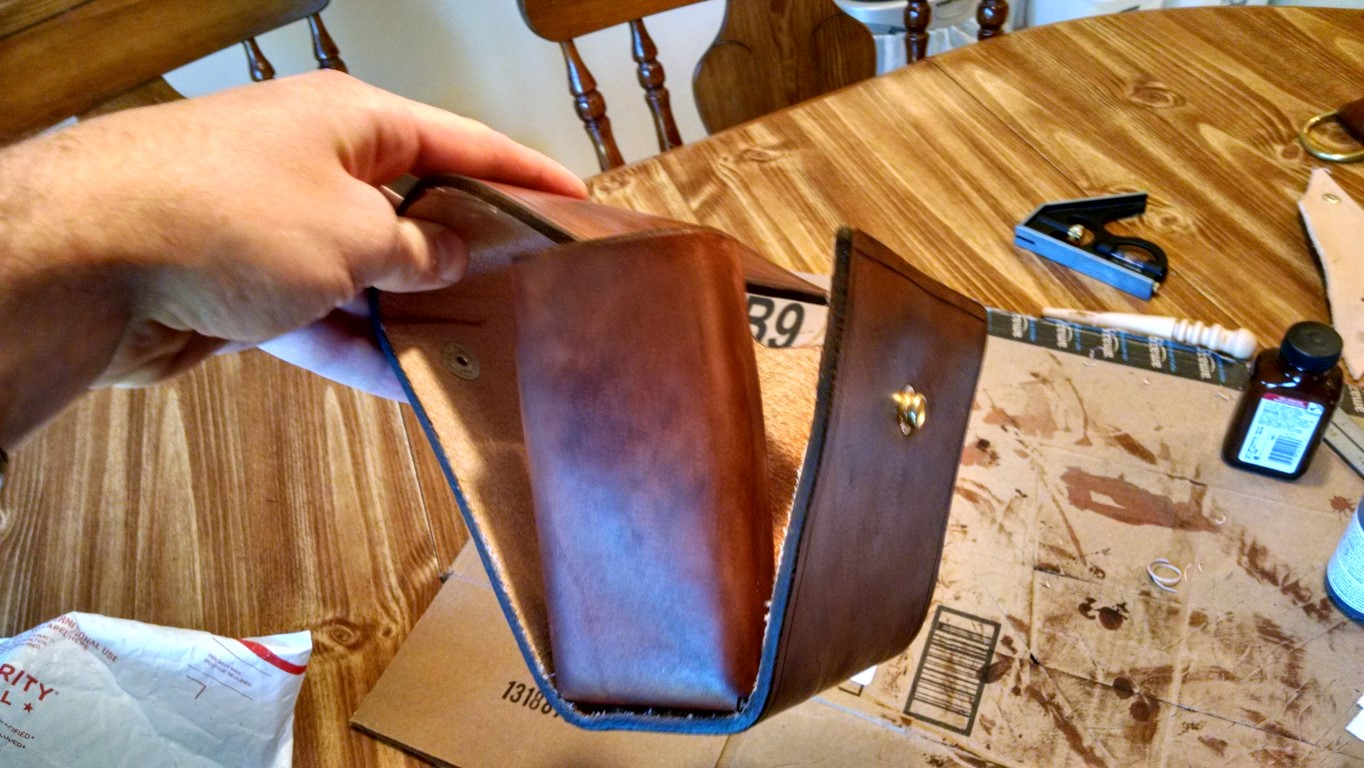
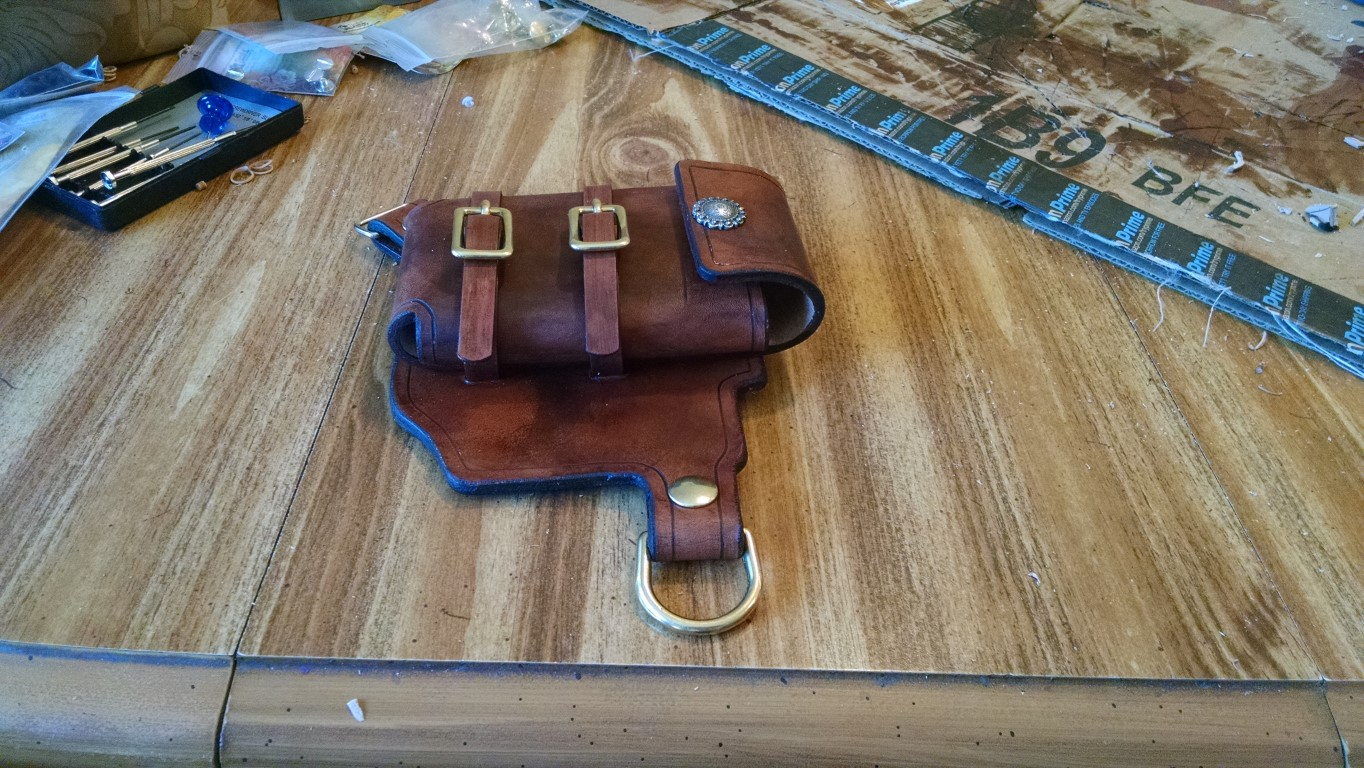
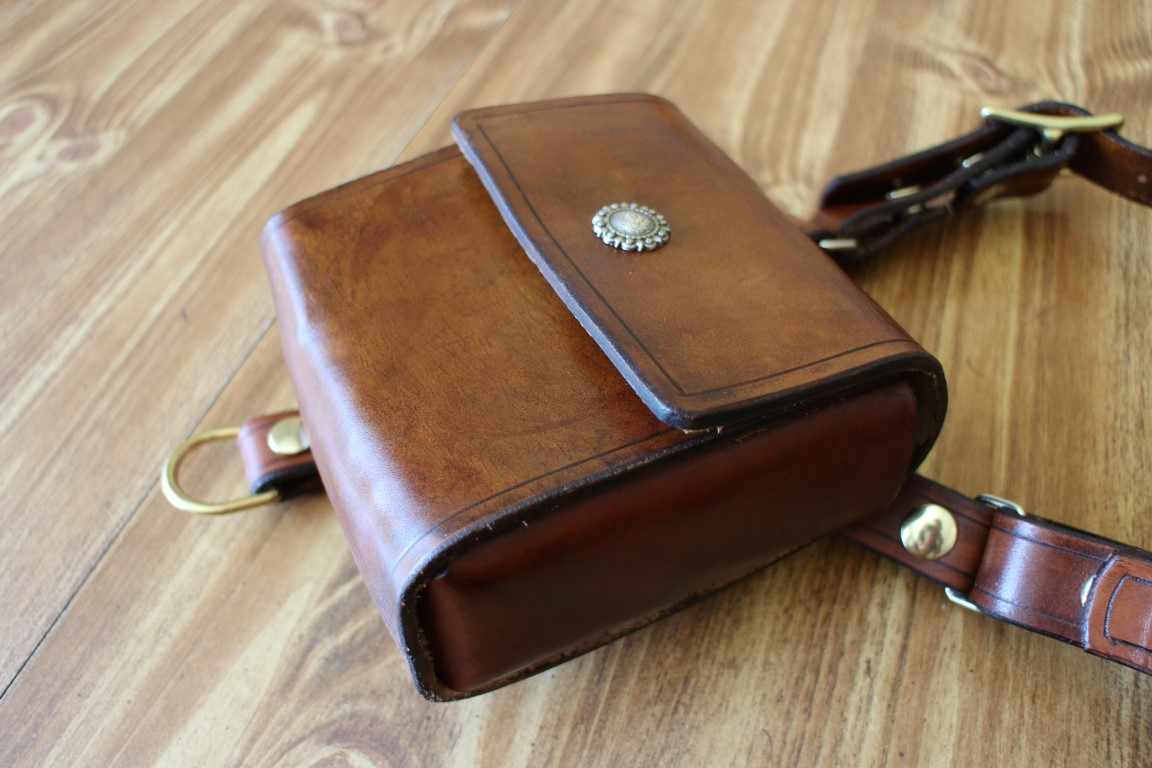
Next I cut out the holster plate and the main piece for the larger pouch. For the pouch, I knew I was going to have to set some snaps. I figured this would be easier to do before the leather was molded into shape. But first I was going to have to dye the leather as well. Normally I would wet mold and then dye last, but I figured it would be fine. I was wrong. After letting the dye dry, I started wet molding and I instantly noticed that dye was running off of the leather. It was quite annoying. Most of the red tone bled out while the brown stayed behind. The result was a slightly different color than all of my other pieces. I ended up applying another layer of dye after the molding was finished, which helped but didn’t get the color exactly back to normal. At least it’s hard to notice. I molded the pouch around a block of wood that I cut to the proper size. I let it dry outside in this 95 degree heat we’ve been having and it dried very quickly.
For the sides of the pouch, I had a rough idea of how big they would need to be. Once the main piece was molded, I just kind of eyeballed it and cut them out how I saw fit. I wet molded these pieces as well. Then I dyed them and attached them with contact cement.
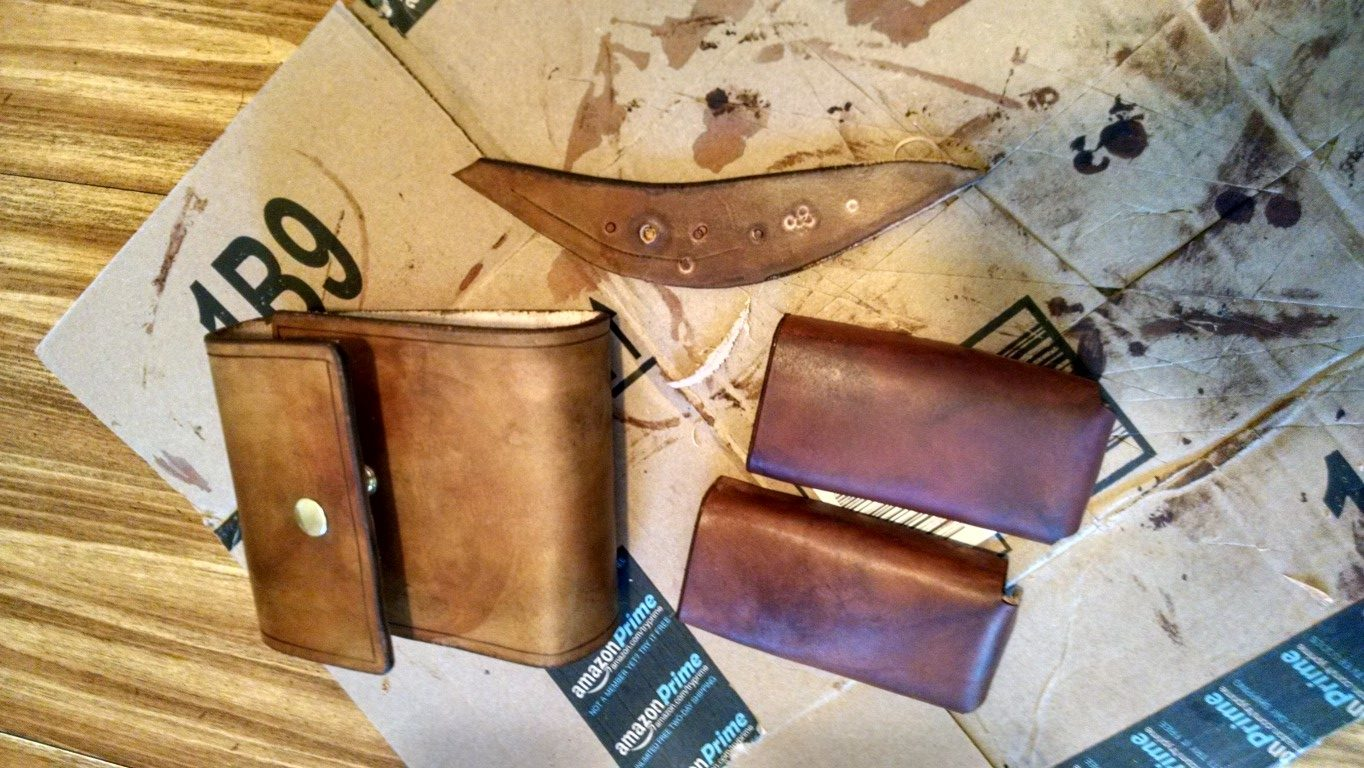
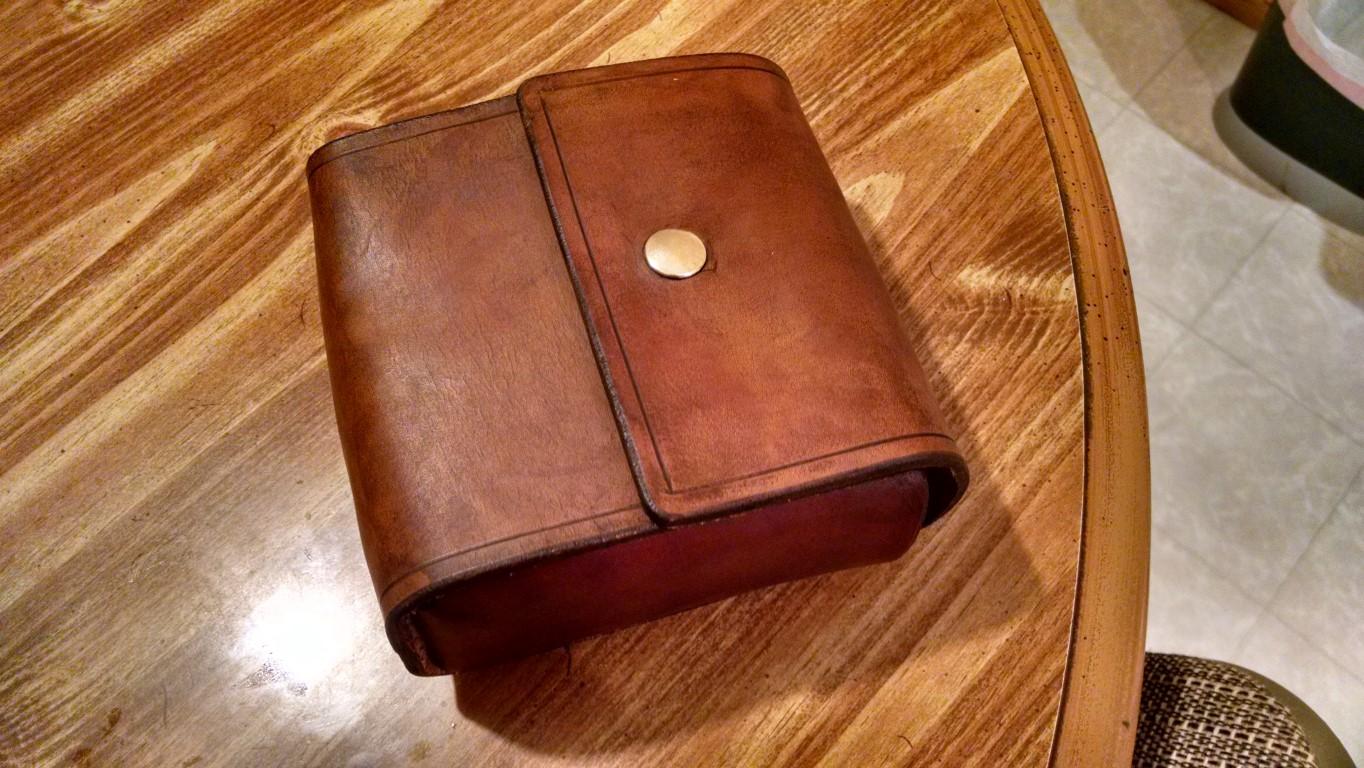
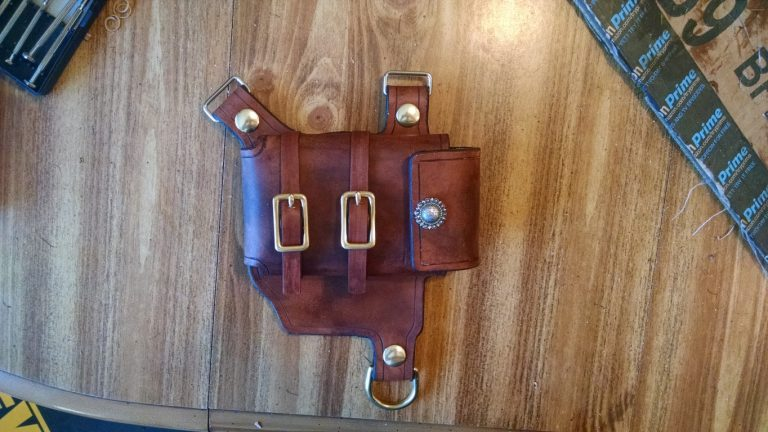
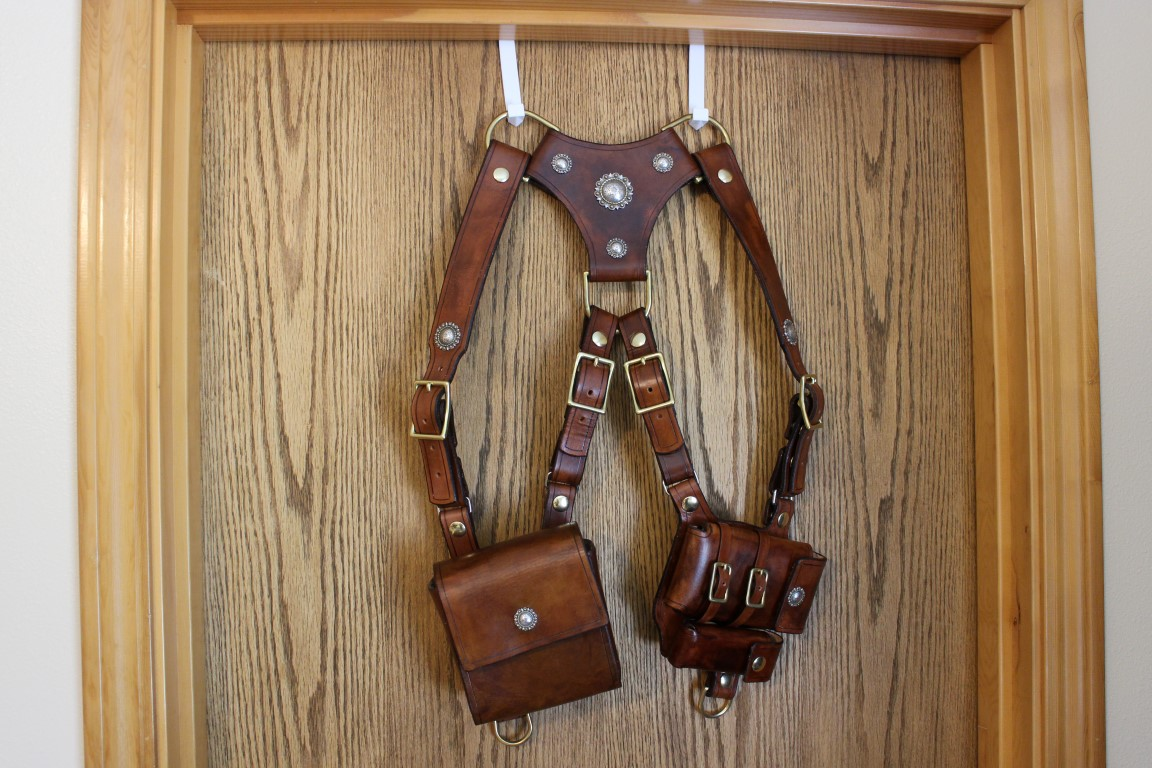
I then cut out the straps for the pouch. I outlined them, beveled them, dyed them, and set some snaps. The result is below.
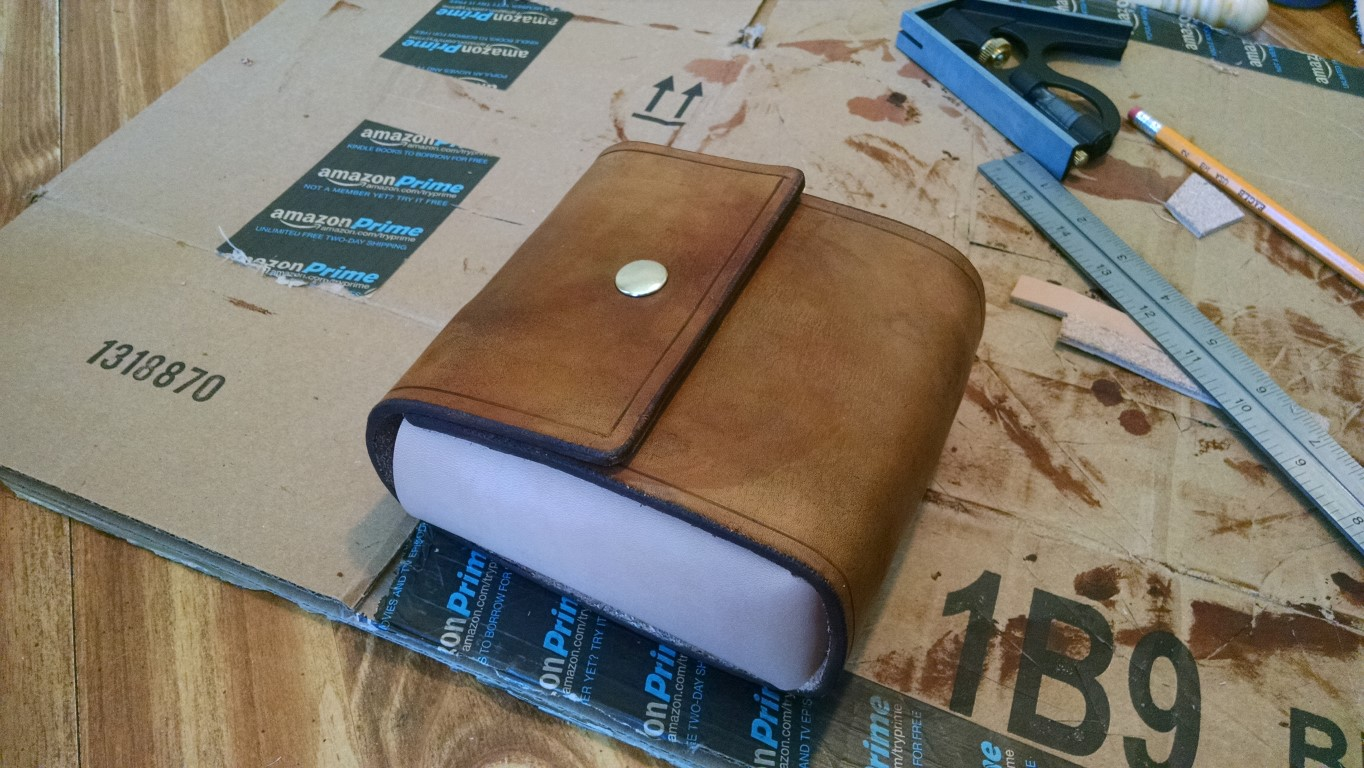
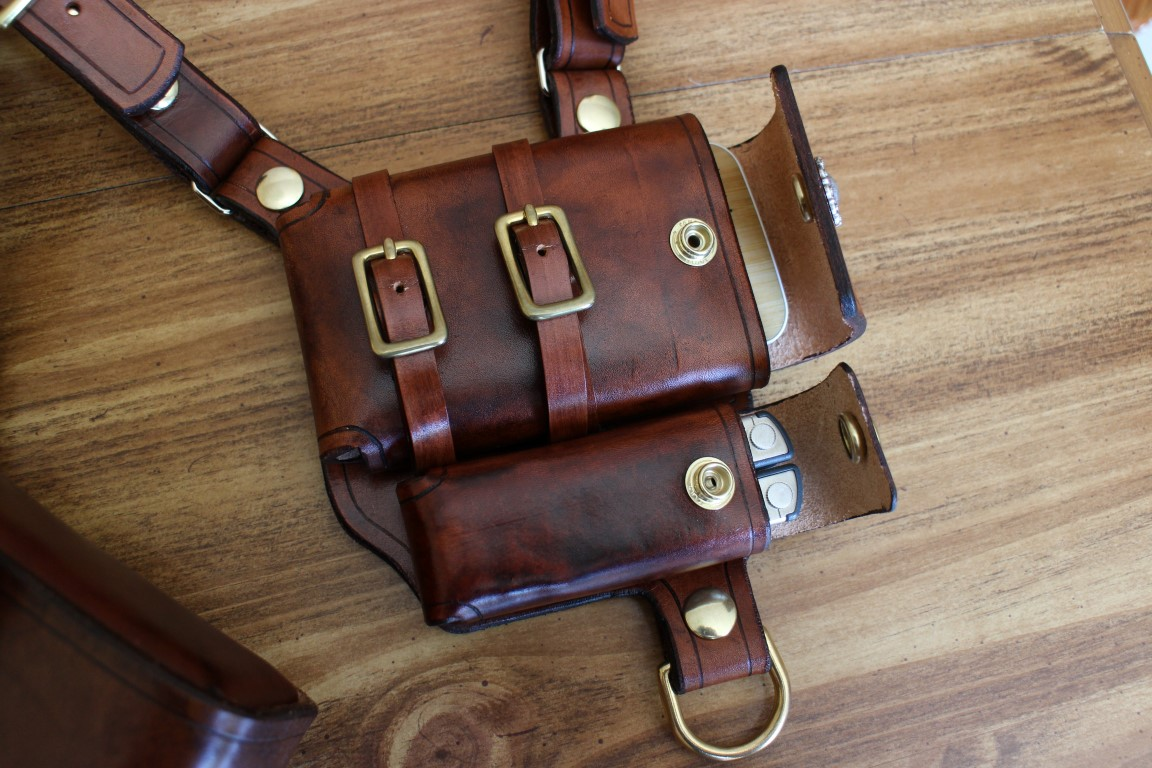
I didn’t take many photos of the phone holster, but it was a similar process. The holster plate was completed and dyed first. Then I made the phone pouch from the template I made. I learned my lesson from the first experience and did my dying after the wet molding. I molded the leather around my actual phone. I wrapped my phone in saran wrap to protect it from the moisture. After it was molded, I dyed it but I realized that I wouldn’t be able to glue it shut. If I glued it shut, I wouldn’t be able to reach in to thread the straps through. Luckily, I realized that the straps would actually hold the phone pouch closed, so no glue was necessary anyways!
I actually held off on making the Leatherman pouch until hte very end, so none of my progress photos include it. The process was similar to the phone pouch though. The only difference is that I used much thinner leather. It’s the same leather I made the phone pouch straps with. I also did not make a template for the Leatherman pouch. I just eyeballed it and measured and cut the leather as I went. Also, the Leatherman pouch was glued shut with contact cement. It attaches to the holster plate using two snaps instead of straps.
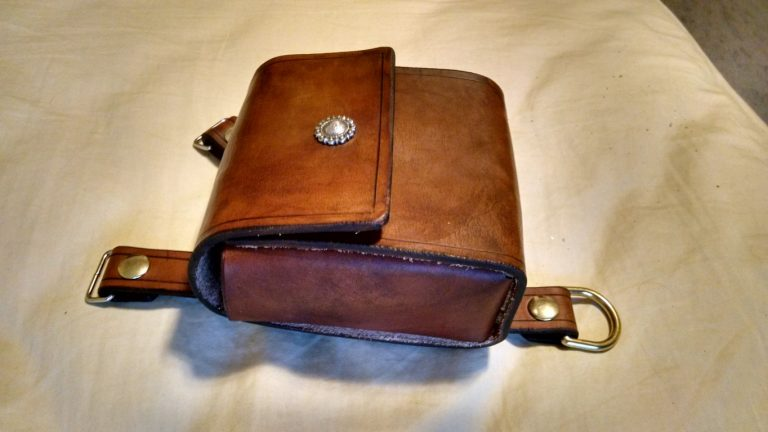
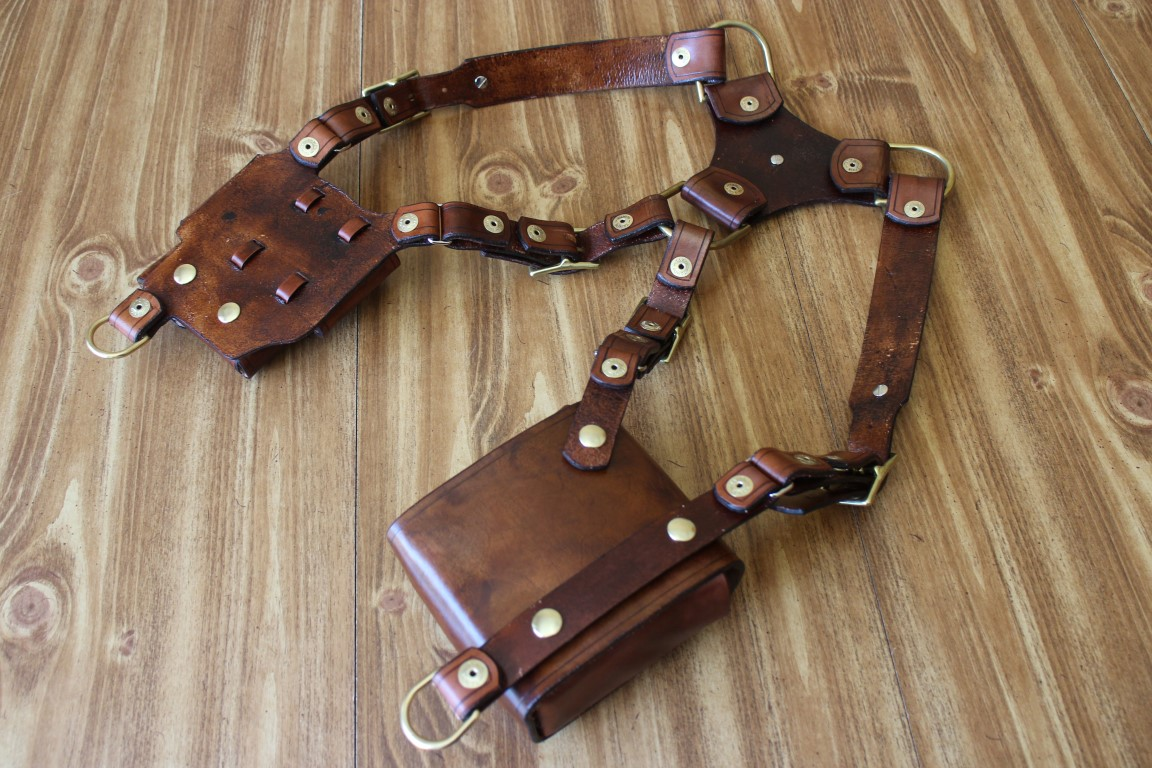
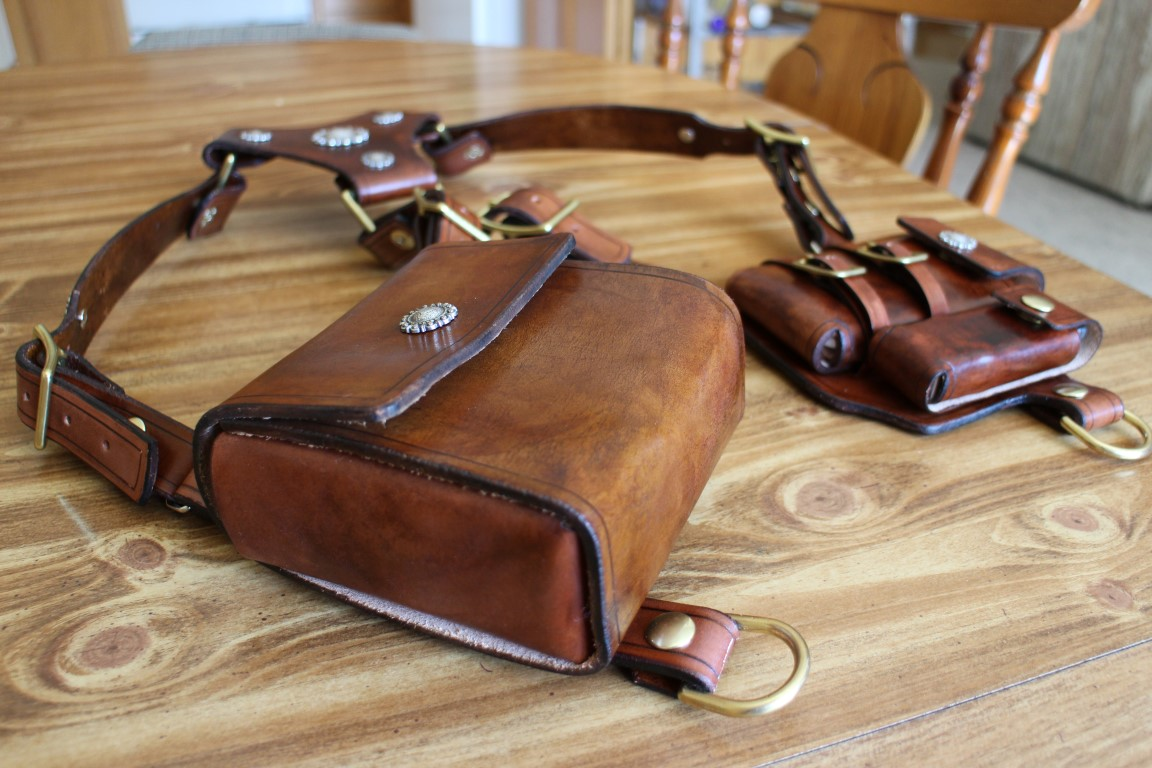
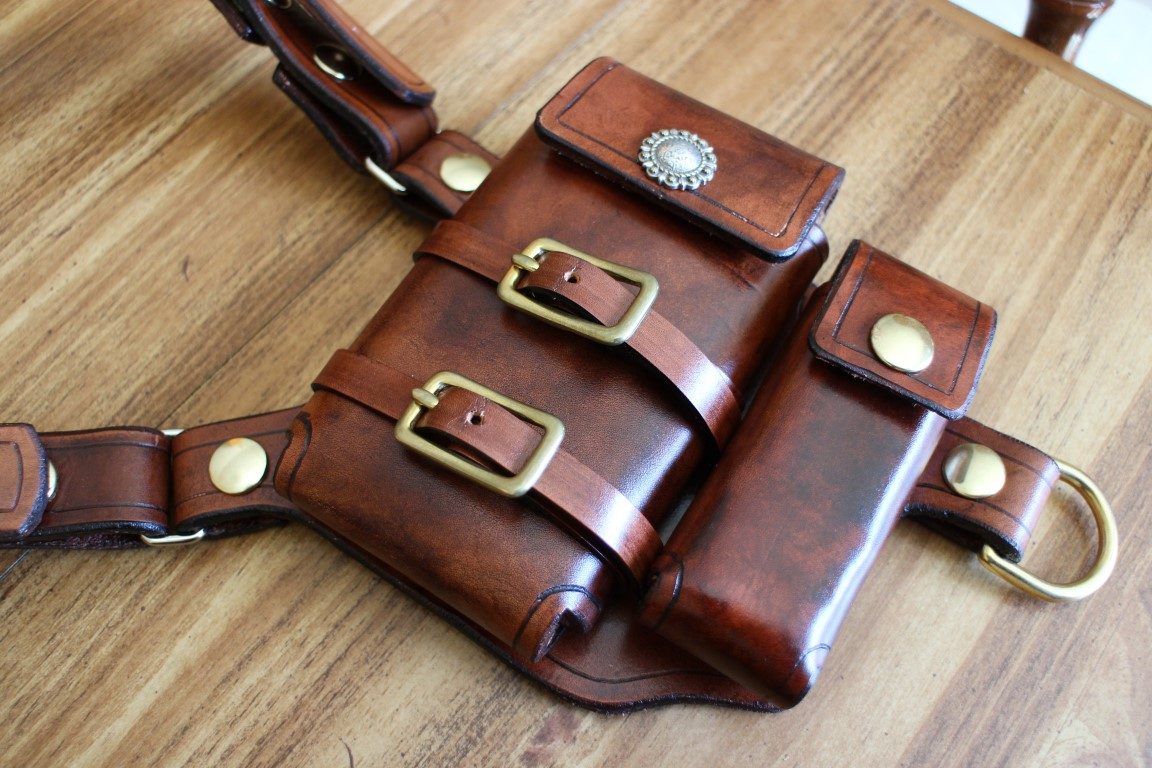
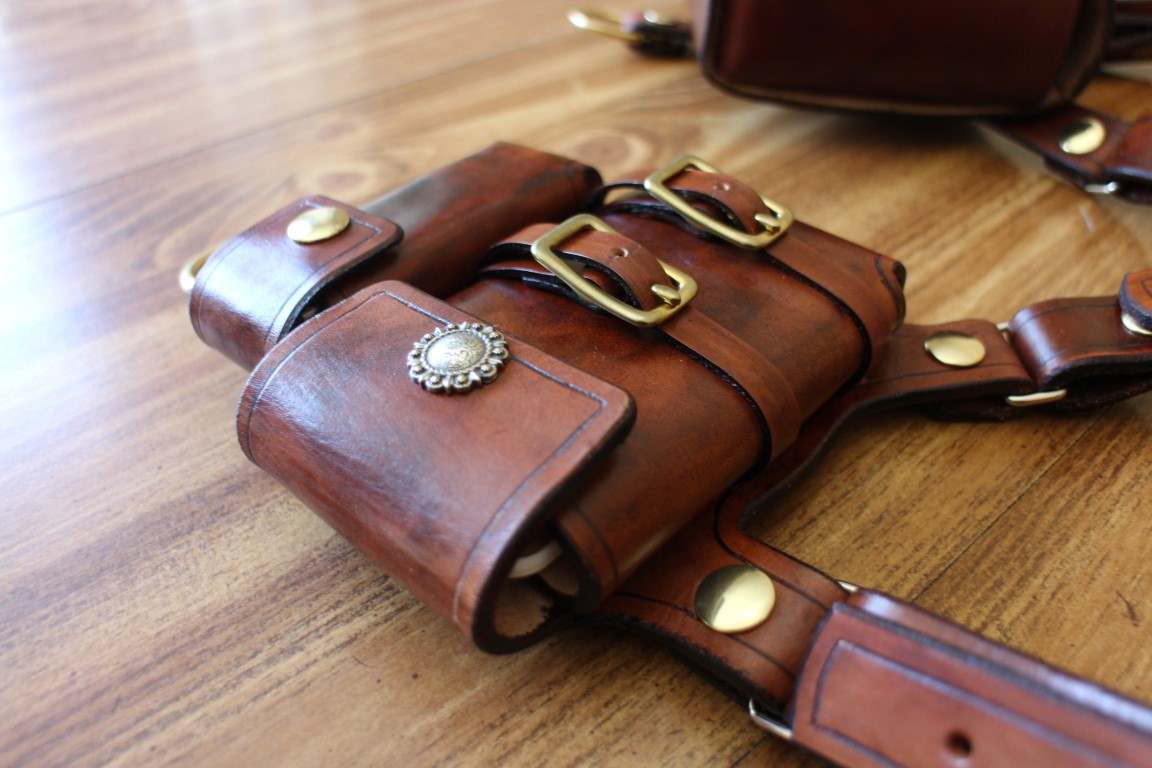
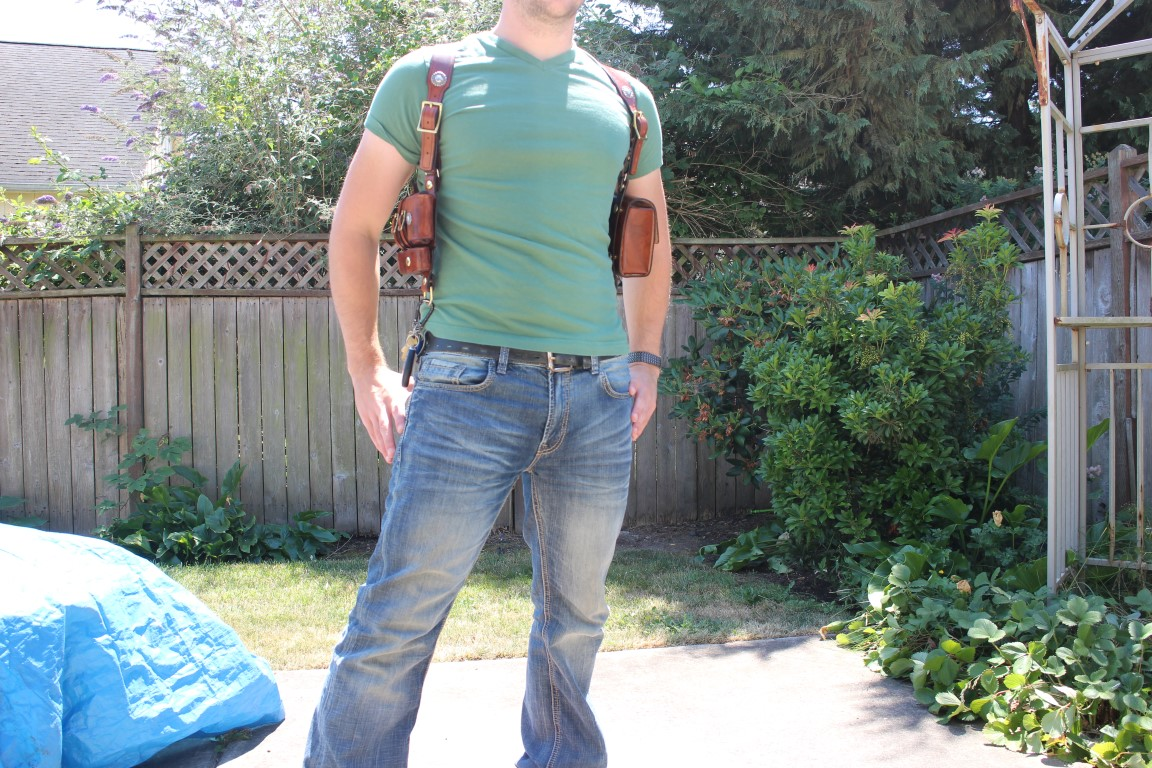
I cut out all of the straps from my templates and then just outlined, beveled, and dyed them. It all came together quite nicely! I ended up having to put a finishing coat with some spray on leather sheen from Tandy. Without it, the dye was bleeding into my clothes when I got sweaty. This not only stained my clothes, but started to discolor the leather dye. The spray sheen was awesome. I put two coats on front and back and it left a nice waxy finish. I didn’t buff it up because I didn’t want my piece to be too shiny. Here are some glamour shots of the finished product.


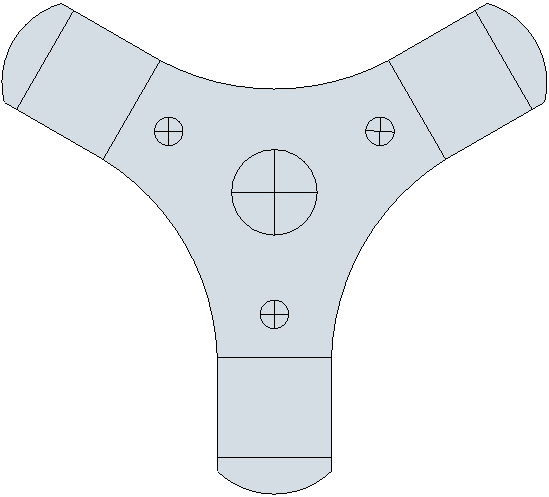
Templates
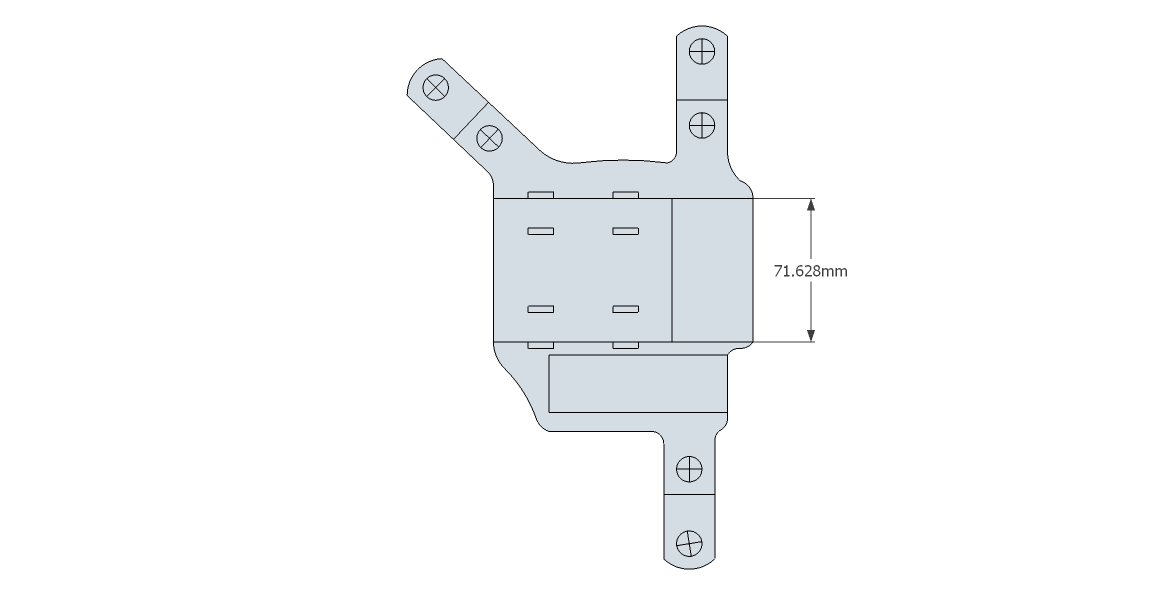
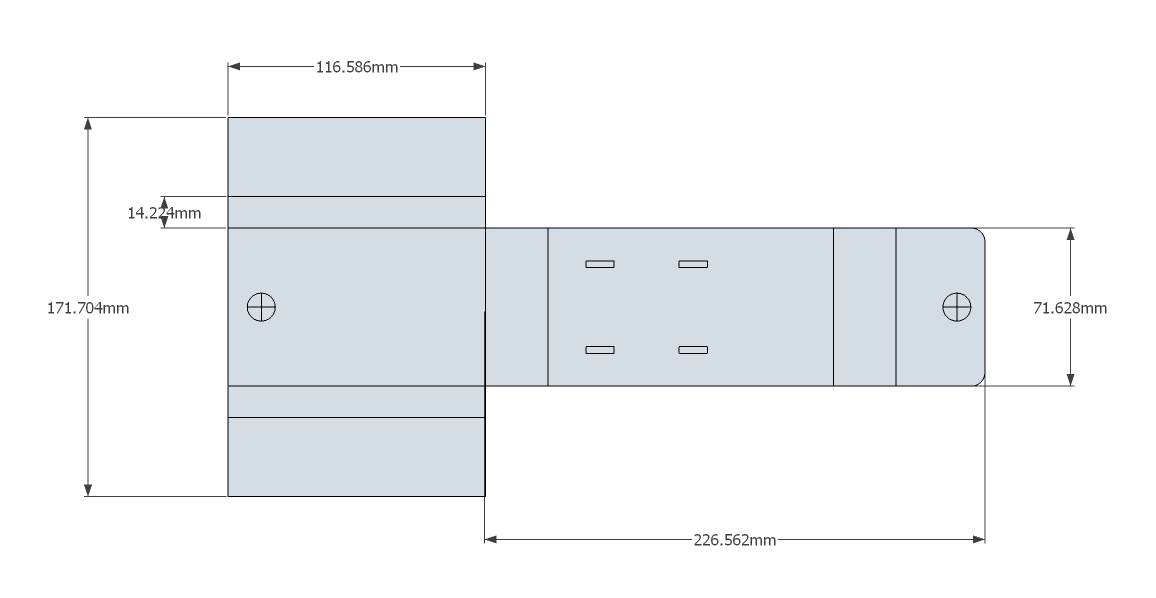
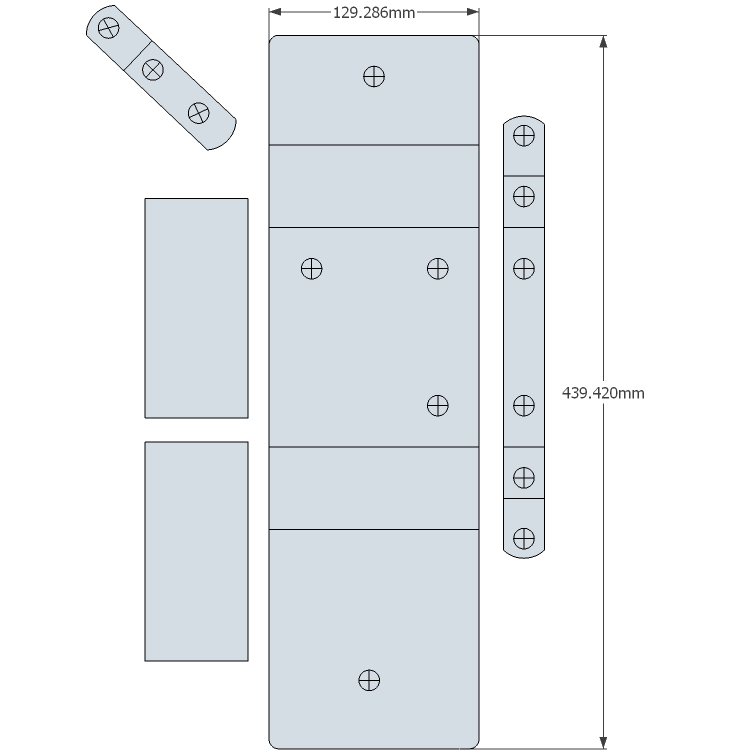
If anyone wants to try to recreate this, here are some template files you can use. Sketchup doesn’t have a good way to export images to scale, so I included some scale information in each image. Just make sure when these are printed, you measure the scales to ensure they are the right size. Most of these templates take up more than one sheet of standard printer paper.
Also, I only have templates for the main components. For the straps, I just cut them out to fit my body. I can list measurements though, which should be enough to duplicate them.
General info: For reference, I am 5′ 11″ and 180lbs. I used mostly 9/10oz leather for the whole project. The Leatherman holder is 4oz as well as the straps for the phone pocket. All hardware is brass wherever possible. The dye I used is Eco-Flo Fudge Brown.
Shoulder straps: These are the largest straps that go up and over the shoulders. They are 16″ long. 1.5″ wide at the shoulders. 1″ wide at the buckle. The 1.5″ portion is 10.25 inches long.
Buckle straps: There are four of these straps and they are all identical. These straps are 1″ wide and 8″ long. When the ends are folded over and snapped, they almost meet in the middle with about a 1/8″ gap in between the ends.
Lower back straps: These straps are also 8″ long and 1″ wide. The difference is that they don’t have buckles attached. Instead, they snap onto the back D-ring and have holes that fit into the buckle tongue.
Phone buckle straps: These are the straps that hold the phone pocket to the holster plate. I don’t recall for sure, but I think they are about 14″ long. They are just under 1/2″ wide and made with 4oz leather I believe.
Leatherman pocket: I eyeballed this and therefore have no template and no real measurements. It was easy enough to do with 4oz leather though.